
Yesterday I posted a picture of my jeweler's saw, and the copper shapes that I planned on enameling today.
After finishing the sawing, filing and sanding of my pieces, I gathered up my supplies to get started enameling.
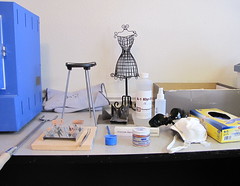
This is a picture of table that shows my enameling fork. My trivets and firing stands. You'll also see my welding safety glasses, my particulate respirator, my fire gloves.
A jar of enamel, sifters, my glass sanding block, KlyrFire (used as an adhesive to get the powdered glass to stick) in a spray bottle. A box of disposable gloves.
The shoe box holds all my jars of enamels, and all my supplies when not in use.
Keep in mind, that I am a beginner at enameling. I am completely self taught, so if there is anyone out there reading this that sees any glaring omissions, please let me know!
The second I'm finished getting out my supplies, I put on the particulate respirator. You need to work in a well ventilated area, and always wear a mask! Enameling powder is ground glass. You do not want to be breathing that in! I've read that these glass particles can hang around in the air for up to two hours. Not to mention that many enamels are leaded. (not all)
So, I think that about covers this picture. If you have any questions let me know. Step 3 coming soon!
I too am interested in trying enameling so I'll be following closely your process. Thanks for sharing : )
ReplyDelete